Insider’s Guide to Your Wedding Videography and Photography Best Outcomes
Planning for your wedding day is full of exciting details—and we’re here to help ensure that your wedding film and portraits turn out just as breathtaking as you envision. To help you get the most from your photography and videography experience, we’ve put together this comprehensive guide, including tips on planning key shots, timing your photo ops, and preparing for an unforgettable day behind the lens.
1. Choosing Your Photographer & Videographer: Match Your Vision
Tip: Choose a photographer and videographer who align with your style—whether that’s timeless and traditional, candid and documentary-style, or a blend of both.
Why it matters: When you and your photographer/videographer share the same creative vision, you’re more likely to get those perfect shots, and you’ll both feel relaxed during the process. Click here to learn more about us.
2. Sample Shot Checklist: What to Plan Ahead
One of the most common regrets couples have is missing specific shots on their wedding day. Planning ahead and communicating exactly what you want is key. Here’s a sample checklist to get you started:
Getting Ready Shots:
Bride’s dress hanging (details)
Bride and groom’s shoes, rings, and accessories
First look with parent(s) or bridal party
Groom getting ready (candid moments)
The Ceremony:
Entrance of the bride and groom
Exchange of vows and rings
First kiss
Guests’ reactions
Any special rituals or traditions
Exit moment (confetti, bubbles, etc.)
Post-Ceremony:
Family portraits (with specific family members, don’t forget these!)
Bride and groom alone shots (first moments together)
Bridal party portraits (with specific combinations of friends/family)
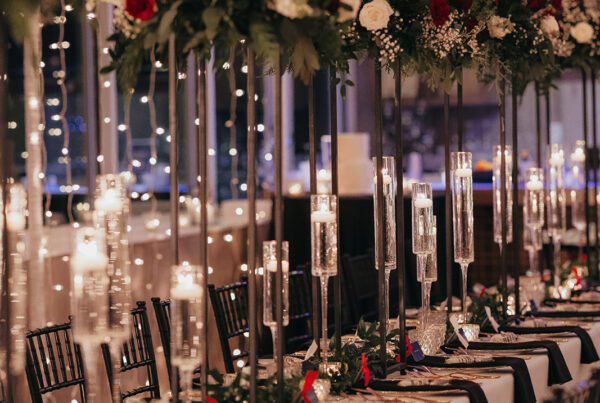
Reception:
Grand entrance
First dance
Parent dances
Cake cutting
Toasts
Candid dancing shots
Creative & Candid Moments:
Fun group photos (think of poses you’d love to try)
Guest candid moments during dinner and dancing
Sunset or golden hour portraits (if timing permits)
Tip: Customize your checklist to include any special requests you have—such as a specific pose or a venue feature you’d like captured.
3. Wedding Day Timeline: Optimal Timing for Photos and Video
Setting the right timeline is key to ensuring everything runs smoothly and that you get the best shots. Here’s a sample timeline for various parts of the day and when they’re best for photos and video:
Pre-Ceremony:
Best time for: Getting ready shots and portraits of the bridal party and groom. You’ll also want time for your photographer and videographer to capture key details like rings, invitations, shoes, and the dress.
Tip: Allow at least 30-45 minutes before the ceremony for getting ready shots. Make sure to have your details (rings, shoes, etc.) prepped and ready.
First Look (Optional but Recommended):
Best time for: Your first look is perfect for capturing those intimate moments without the pressure of the ceremony. If you can, schedule this about 1-2 hours before the ceremony for the best lighting.
Tip: Schedule this in a quiet, shaded area to avoid harsh lighting or too much public attention.
Post-Ceremony:
Best time for: Family and bridal party portraits. This is a great time for you and your photographer to go through the shot list and tick off groupings and candid moments.
Tip: If you’re doing bridal portraits or couple shots, aim to do this right after the ceremony while the natural adrenaline and excitement are still high.
Golden Hour Portraits (If possible):
Best time for: Sunset or golden hour photos will give you warm, soft lighting that’s perfect for intimate portraits.
Tip: Check the timing for sunset based on your wedding date and location. Plan ahead for this 30-minute window to capture stunning shots.
Reception:
Best time for: Candid dancing shots, toasts, cake cutting, and other memorable moments. Keep the party atmosphere in mind.
Tip: If you want a good mix of candid and posed moments, make sure your photographer and videographer know when to step back and just capture moments naturally.
4. Scout Locations & Discuss Poses with Your Photographer
Tip: Take time during your venue visit to talk with your photographer about potential shooting locations. Find areas with good lighting or that have special significance to you, like a favorite tree or spot that holds a memory.
Pose Ideas & Composition:
If you have a vision for a particular shot, let your photographer know in advance. This could include a particular pose or type of composition.
Don’t feel pressured to know all the poses, but if you have preferences (e.g., soft, candid moments vs. more formal, classic portraits), it helps to communicate them.
Tip: Your photographer will guide you, but if you want to incorporate creative ideas like unique angles or specific compositions (e.g., reflections in windows, dramatic lighting, or even a specific theme), sharing these ideas ahead of time can help.
5. Post-Wedding: What to Expect from Your Photographer and Videographer
Editing Timeline: After your wedding, your photographer and videographer will begin editing your photos and wedding films. This process can take anywhere from 4 to 12 weeks, depending on the package.
Tip: Stay in touch with your photographer and videographer about your expectations for edits, such as preferred styles for the final wedding film or portrait album.
About TWELVE ONE & CO. At Twelve One & Co., we specialize in capturing timeless moments through expert videography and photography services in Des Moines, Iowa. With a passion for storytelling, our team focuses on creating stunning, high-quality imagery that perfectly reflects your unique personality and the special milestones in your life.
Whether it’s your wedding day, a family portrait, or a milestone event, we pride ourselves on delivering authentic, emotional, and beautifully crafted photos and films that will last a lifetime. As a husband-and-wife team, we understand the importance of personal connections and the value of every fleeting moment. Our goal is to make sure each moment we capture feels as special as the day itself. Explore our photography and film services to learn more about how we can create timeless photography and videography experiences tailored to your needs.
At Twelve One & Co., we specialize in capturing timeless moments through expert videography and photography services in Des Moines, Iowa. With a passion for storytelling, our team focuses on creating stunning, high-quality imagery that perfectly reflects your unique personality and the special milestones in your life. Whether it’s your wedding day, a family portrait, or a milestone event, we pride ourselves on delivering authentic, emotional, and beautifully crafted photos and films that will last a lifetime. As a husband-and-wife team, we understand the importance of personal connections and the value of every fleeting moment. Our goal is to make sure each moment we capture feels as special as the day itself. Explore our photography and film services to learn more about how we can create timeless photography and videography experiences tailored to your needs.